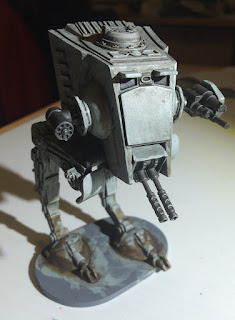
Due to migraines I haven't finished my AT-ST, but yesterday I did find a solution to my paint storage. I had been looking for something to show the paints, while keeping them easy to access and that looked good. I originally thought I would go for a large spice rack or something like that.
Instead I found these shelves.
Three of these would hold the entire Citadel paint range (just) and the grey bases are very grippy and mean the pots are very secure. Before yesterday I just had a growing sprawl of pots over my painting area, now I feel like I not only have organisation, but room to grow. And the OCD part of me thinks the paints in a row look pretty.
Of course now I just need to avoid buying paints I don't need just to fill colour gaps.
Monday, June 29, 2015
Saturday, June 27, 2015
AT-ST Post Corrision - Almost done
Here is the AT-ST post highlight and corrosion.
One thing that happened is the guns, which were really loose, are now completely stuck and don't move at all. No idea when that happened. Fortunately they are in a good position, so I am not sure I want to do anything about that.
Almost done. Just some mild rust drybrushing and the base to finish.
One thing that happened is the guns, which were really loose, are now completely stuck and don't move at all. No idea when that happened. Fortunately they are in a good position, so I am not sure I want to do anything about that.
Wednesday, June 24, 2015
AT-ST Post Black Wash
So I finally did the black wash on my AT-ST last night, and it came out okay. Not as smooth or as clean as I would have liked. The cloth I used was too large and too awkward to handle, and I lost too much time trying to hold it right so I could get it where I wanted and that resulted in the Nuln Oil drying too much sometimes. I also had some overruns of paint I didn't see until too late.
Nothing I think that will ruin the mini however.
I am now a little over half way done with the AT-ST, probably about 4-5 hours of work left. I have another one to do that will be more complex, but I think the lessons I have learned will help me with that one.
Nothing I think that will ruin the mini however.
I am now a little over half way done with the AT-ST, probably about 4-5 hours of work left. I have another one to do that will be more complex, but I think the lessons I have learned will help me with that one.
Saturday, June 20, 2015
AT-ST about 1-3 of the way through...
This is my AT-ST from Imperial Assault about 6 hours into the painting journey, and before the wash.
I am really nervous about screwing up the next stage, so I wanted to share what it looks like now in case it goes horribly wrong.
I am really nervous about screwing up the next stage, so I wanted to share what it looks like now in case it goes horribly wrong.
Monday, June 15, 2015
DungeonQuest Minis - Aiming for Quick and Table Ready
With my Imperial Assault minis, I have been following Sorastro's guides and often putting in a LOT of hours to get the best possible quality I can with my skill level.
However, I am also wanting to use what I have learned to make other minis "table ready".
So first I had to define what I felt was "table ready" for myself.
So here is my first attempt at this. Hugo the Glorious from DungeonQuest: Revised Edition.
I need to get a better system for taking photo's of miniatures. The camera I have doesn't seem to be able to cope very well.
However, I am also wanting to use what I have learned to make other minis "table ready".
So first I had to define what I felt was "table ready" for myself.
- It has to look like the character from the game.
- It has to stand out on the board.
- It has to be clear which character it is.
- It has to look good at play distance, which is normally at least 30cm away.
- It does NOT need to look amazing at close up distances.
Then I had to set myself a goal with regards to how long I think it should take me to do a "table ready" mini. I have started with a time frame of 2 hours, but I hope to get it down closer to 60-75 minutes. This includes all setup and cleanup time, in an hour of painting time, I probably only spend about 20 minutes with brush in hand.
So here is my first attempt at this. Hugo the Glorious from DungeonQuest: Revised Edition.
Here is the original art from the game I was trying to replicate.
The DungeonQuest minis are a lot smaller than the Imperial Assault ones, only about 30mm high. Those squares behind him are 1 inch.
All in all, I am very happy with this.
I need to get a better system for taking photo's of miniatures. The camera I have doesn't seem to be able to cope very well.
Subscribe to:
Comments (Atom)


